Umbraco and Azure
The Umbraco CMS platform has come a long way in recent years and the back office improvements for version 7 makes it one of the nicest to use CMS's around. I've always found the initial Umbraco setup a bit of a pain so when I saw the option to create an Umbraco instance in Azure I jumped at the chance to rebuild this blog. In this post I will walk you through the process of setting up a new Umbraco instance in Azure.

Setting up Azure
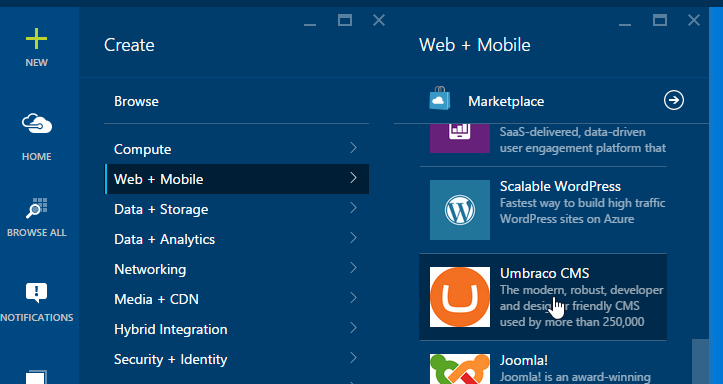
The first thing to do is to head over to your Azure portal. If you haven't signed up to Azure yet you should grab yourself a free trail. Once in the portal you just need to follow the +New wizard through Web + Mobile to Umbraco CMS.
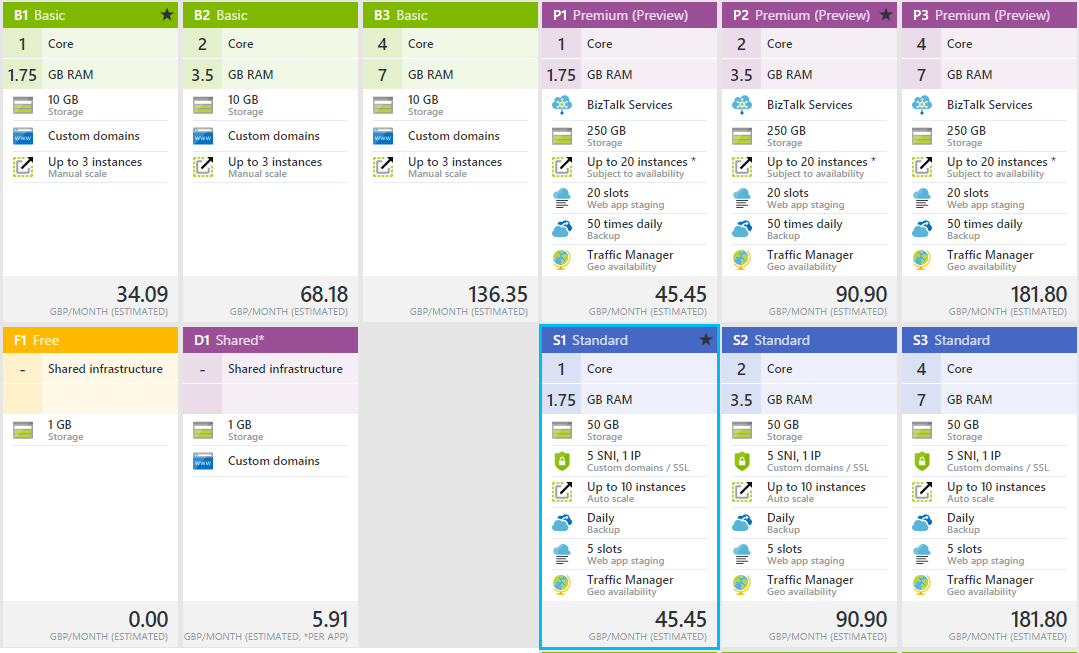
To run our Umbraco site we're going to need to configure a web app and a database. First lets create the web app. All of the settings are obvious enough but you may need to have a think about which pricing tier you need. You'll save a lot if you can get by on shared infrastructure. This limits your file storage to 1GB and prevents you for adding an SSL certificate so if have any user authentication it's no good. However, if you this isn't a problem for you you'll get your web app for less that £6 per month. Other plans range from £34pm to £181pm. All these values are estimated and will change based on your traffic. This site is running on shared infrastructure.
Here's the full range of pricing tiers with their estimated costs:
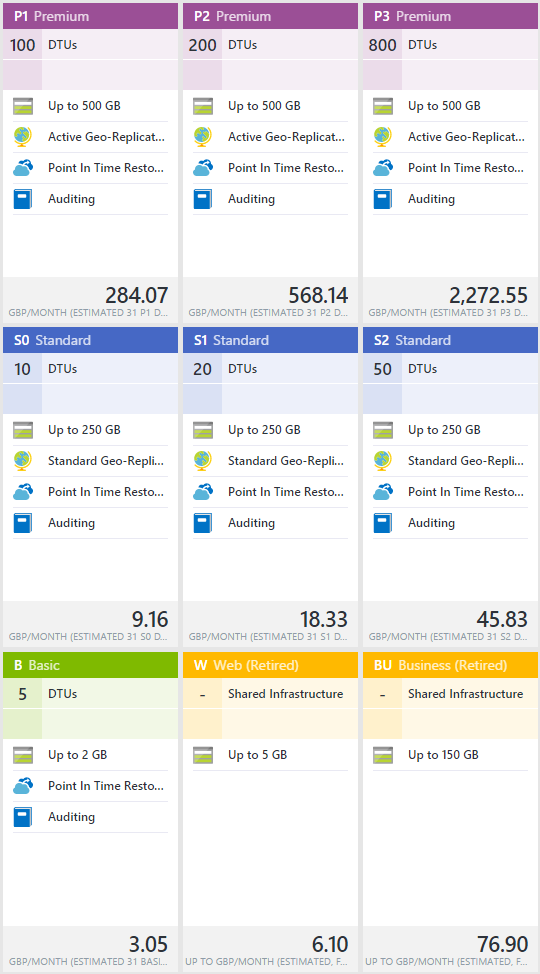
Next we'll setup your database and it's much the same - set the name, configure the server and select a pricing tier. As with the web app you'll need to have a think about which tier to go for. To give you and idea of the performance Microsoft have kindly provided some benchmarks. One thing to note is that the S3 Standard and S Elastic databases are not available here as this is running SQL V11. I'm running this blog on the smallest standard server and I've not seen any issues with performance.
Setting up Umbraco
With this all configured go ahead and hit create. It'll take a minute but once done you can simply browse to your new Umbraco installation to get the all too familiar Umbraco 7 install screen.
Complete this as normal but make sure you don't do the default install as this will ignore the SQL database you just configured and will use SQL Server CE instead. Customize the install and set the database type to Microsoft SQL Azure. The server name and database details can be taken from the SQL Server and SQL Database you just created, as with the credentials.
All that's left is to select a starter kit and complete the installation.
Once configured you should notice that it's pretty nippy. The next thing to solve is how to deploy your customisations from source control.